
Footage Looks Blown Out in Premiere
Are you experiencing issues with your footage appearing blown out when editing in Adobe Premiere Pro? This common problem can be frustrating, but luckily there are several steps you can take to address and resolve this issue.
Key Takeaways:
- Blown-out footage can occur due to improper exposure settings or incorrect camera settings.
- Adjusting the brightness and contrast levels in Premiere can help restore the original look of the footage.
- Using color correction tools such as curves or levels can help fine-tune the appearance of blown-out footage.
- Properly exposing your footage during shooting can prevent blown-out visuals during the editing process.
- Exporting the final edited video in the correct format can preserve the quality of the footage.
Blown-out footage refers to a situation where the brightness of an image is too high, causing details to be lost and the overall image to appear overexposed. This issue can occur due to incorrect exposure settings during shooting or improper camera settings. It is important to correct this issue in post-production to restore the original look and feel of the footage.
To address blown-out footage, start by adjusting the brightness and contrast levels in Adobe Premiere Pro. This can be done by navigating to the “Lumetri Color” panel and using the sliders to make the necessary adjustments. Pay attention to the histogram, which displays the distribution of brightness values, to avoid pushing highlights or shadows too far.
In addition to adjusting brightness and contrast, Premiere offers other color correction tools that can be utilized to fine-tune the appearance of blown-out footage. The “Curves” tool allows for more detailed control over specific tonal ranges, while the “Levels” tool adjusts the black, white, and gray points of the image. Experimenting with these tools can help restore the proper exposure and overall quality of your footage.
Preventing Blown-Out Footage
It is always better to prevent blown-out footage during the shooting process, rather than relying solely on post-production fixes. Here are some tips to help you avoid this common issue:
- Monitor your exposure levels during shooting using the camera’s histogram or zebras.
- Avoid shooting in harsh lighting conditions or direct sunlight, which can lead to overexposure.
- Consider using ND filters or adjusting the camera’s aperture, shutter speed, or ISO settings to control exposure.
- Use exposure compensation when necessary to maintain proper exposure in challenging lighting situations.
Exporting the Final Video
Once you have successfully corrected the blown-out footage in Premiere, it is important to export the final edited video in the appropriate format to preserve its quality. Ensure that you choose a format that supports the necessary color depth and dynamic range for your footage. Additionally, pay attention to the bitrate settings to minimize compression artifacts and maintain the clarity of your video.
Tables
| Tool | Description |
|---|---|
| Curves | Provides detailed control over specific tonal ranges of the image. |
| Levels | Adjusts the black, white, and gray points of the image. |
| Color Wheels | Allows adjustment of the color balance in shadows, midtones, and highlights. |
| Tips |
|---|
| Monitor exposure levels during shooting using the camera’s histogram or zebras. |
| Avoid shooting in harsh lighting conditions or direct sunlight. |
| Consider using ND filters or adjusting the camera’s aperture, shutter speed, or ISO settings. |
| Format | Color Depth | Bitrate |
|---|---|---|
| H.264 | 8-bit | 10Mbps |
| ProRes | 10-bit | 40Mbps |
| DNxHD | 10-bit | 50Mbps |
By following these steps and best practices, you can effectively address blown-out footage issues in Adobe Premiere Pro. Remember to properly expose your footage during shooting, utilize color correction tools in post-production, and export the final video in the appropriate format. With these techniques, you can achieve visually appealing and professional-looking results for your projects.

Common Misconceptions
Paragraph 1: The Footage is Blown Out
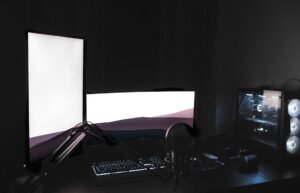
One common misconception people have is that the footage looks blown out in Premiere. This often occurs because of the incorrect interpretation of the video preview within the software. However, it is important to understand that the blown-out appearance is merely a representation of the highlights and may not reflect the actual final output.
- Adjusting exposure and contrast settings can help alleviate the blown-out appearance
- Use the histogram tool in Premiere to identify overexposed areas accurately
- Remember to disable any video effects or filters that may alter the footage’s appearance
Paragraph 2: Lack of Knowledge on Color Grading
Another misconception is that the blown-out appearance is solely due to the editing software. While Premiere does play a role, it is important to note that color grading has a significant impact on the overall look of the footage. Understanding color grading techniques can help resolve the blown-out effect and create a visually pleasing final product.
- Learn about color grading techniques and how to balance exposure properly
- Experiment with adjusting highlights, shadows, and midtones in the color grading process
- Consider using professional color grading plugins or presets to enhance the footage
Paragraph 3: Poor Camera Settings
One misconception is that the blown-out appearance is directly caused by the editing process, when in fact, the problem may lie with the camera settings during the initial filming. Incorrect exposure settings, high ISO levels, or improper white balance can all lead to blown-out footage, even before it reaches Premiere.
- Ensure proper exposure settings while shooting to avoid blowing out highlights
- Maintain a balanced white balance setting to avoid color discrepancies
- Keep an eye on the ISO level and adjust it according to the lighting conditions
Paragraph 4: Monitor Calibration and Viewing Environment
People often assume that the blown-out appearance is solely due to the footage or Premiere, neglecting the impact of monitor calibration and viewing environment. Improper monitor calibration, viewing the footage in unfavorable lighting conditions, or using a non-color-accurate monitor can all contribute to the blown-out appearance.
- Ensure your monitor is properly calibrated for accurate color representation
- View the footage in a controlled environment with consistent lighting conditions
- Consider investing in a high-quality monitor with a wide color gamut for better color accuracy
Paragraph 5: Export Settings and Compression
A final misconception is that exporting the footage with incorrect settings or using excessive compression may cause the blown-out appearance. It’s important to understand and configure the export settings correctly to maintain the quality of the footage throughout the final export process.
- Choose the appropriate export settings that match the desired output format and quality
- Avoid excessive compression to preserve the details and dynamic range of the footage
- Test different export settings to find the optimal balance between file size and visual quality

Footage Looks Blown Out in Premiere
In the world of video editing, achieving the perfect balance of exposure and contrast can greatly enhance the quality and impact of your final product. However, there are times when footage may appear blown out or overexposed, causing it to lose detail and visual appeal. In this article, we will explore the potential causes of blown-out footage in Adobe Premiere Pro and provide some useful tips to address this issue effectively.
1. Brightness and Contrast Adjustments
To correct blown-out footage, adjusting the brightness and contrast settings is a fundamental step. Finding the right balance between light and dark elements can help restore detail and visual fidelity to your clips.
| Problem | Solution |
|---|---|
| The overall footage is overly bright. | Decrease brightness or increase contrast. |
| Highlights are blown out or lacking detail. | Decrease highlights, adjust curves, or use a highlight recovery tool. |
| Shadows appear too dark or blocky. | Increase shadow detail, adjust curves, or use a shadow recovery tool. |
2. Color Correction Techniques
Another aspect to consider when tackling blown-out footage is color correction. Adjusting the color balance and tonal range can significantly improve the overall look and feel of your clips.
| Problem | Solution |
|---|---|
| The footage exhibits a color cast or tint. | Apply a color correction filter or use color grading techniques. |
| The colors lack vibrance or appear flat. | Enhance saturation or apply a vibrance adjustment. |
| Color transitions are choppy or unnatural. | Smooth color gradients using color correction tools. |
3. Lighting Considerations
In some cases, blown-out footage may be a result of inadequate lighting conditions during filming. Understanding how different lighting setups affect exposure can help prevent this issue from occurring in the first place.
| Problem | Solution |
|---|---|
| Harsh shadows or washed-out subjects. | Utilize diffusers or reflectors to soften harsh lighting. |
| Insufficient lighting leading to underexposed footage. | Adjust the lighting setup or use additional light sources. |
| Glare or reflections overpowering the subjects. | Modify the angles of lighting or use polarizing filters. |
4. Camera Settings and Exposure
The way you set up your camera and handle exposure settings can greatly impact the level of detail and dynamic range captured in your footage.
| Problem | Solution |
|---|---|
| The footage is consistently overexposed. | Decrease the camera’s exposure or use neutral density filters. |
| Poorly adjusted white balance affecting colors. | Manually set white balance or use custom color profiles. |
| Underexposed footage lacking detail. | Increase the camera’s exposure or use additional lighting. |
5. Monitor Calibration and Viewing Environment
When working on footage in Premiere, it is crucial to ensure your monitor is calibrated correctly and that you are in a suitable viewing environment. This helps you accurately judge the exposure levels and avoid any misinterpretations.
| Problem | Solution |
|---|---|
| The footage appears blown out on certain displays. | Calibrate your monitor using calibration tools. |
| Environmental lighting affecting your perception of exposure. | Work in a dimly lit environment or use a color-neutral workspace. |
| Adjustments made based on inaccurate monitor representation. | Regularly calibrate and profile your monitor. |
By utilizing the aforementioned techniques, Premiere users can rectify blown-out footage, restoring depth, detail, and visual balance to their video projects. Understanding the causes and solutions provides editors with the necessary tools for achieving the desired aesthetic result.
Remember, each video is unique, and experimentation with different adjustments may be required to find the perfect fix for your blown-out footage. With dedication, practice, and a discerning eye, you can transform your overexposed clips into stunning visual experiences.
Frequently Asked Questions
What causes footage to look blown out in Premiere?
Footage can look blown out in Premiere due to incorrect exposure settings during shooting, overexposure of the
footage, or improper adjustment of the brightness and contrast levels in the editing process.
How can I fix blown out footage in Premiere?
To fix blown out footage in Premiere, you can adjust the exposure, contrast, and brightness levels using the
Lumetri Color panel, apply color grading techniques, or use additional plugins or effects to enhance the
overall look of the footage.
Can blown out footage be recovered in Premiere?
Depending on the severity of the blowout, it is possible to recover some detail in blown out footage using
Premiere’s exposure and highlight recovery tools. However, it’s important to note that excessive blowout may
result in permanent loss of detail and information.
Why does my footage appear washed out after rendering in Premiere?
The footage may appear washed out after rendering in Premiere due to incorrect export settings, such as low
bitrates or incorrect color space configurations. It’s important to use appropriate export settings to
maintain the desired visual quality of the footage.
What is the recommended workflow for handling blown out footage in Premiere?
The recommended workflow for handling blown out footage in Premiere involves starting with properly exposing
the footage during shooting, capturing in a log or raw format for greater flexibility in post-production,
and then carefully adjusting the exposure, highlights, and shadows in Premiere to recover details and ensure
a balanced look.
Are there any plugins or effects specifically designed to fix blown out footage in Premiere?
Yes, there are several plugins and effects available for Premiere that are designed to fix blown out footage.
Some popular options include Dehaze, Highlight Recovery, and plugins offered by third-party developers, which
provide advanced tools for salvaging blown out details and improving overall image quality.
How can I prevent blown out footage in the first place?
To prevent blown out footage, it’s essential to properly expose the scene during shooting. This can be done
by using proper camera settings, utilizing the histogram or zebras to monitor exposure levels, and avoiding
excessive exposure to bright light sources.
What are some common signs of blown out footage?
Common signs of blown out footage include loss of detail in bright areas, excessive glare or blooming, lack of
contrast, and an overall washed-out appearance. These issues can be visually identified when the highlights
are clipped and cannot be recovered.
Does Premiere offer automatic features to fix blown out footage?
Yes, Premiere provides automatic features, such as Auto Tone and Auto Contrast, which can be utilized to
quickly improve the look of blown out footage. However, manual adjustments often allow for more precise
control and tailored corrections.
Can I use other editing software to fix blown out footage?
Yes, other editing software, such as Final Cut Pro, Davinci Resolve, or Avid Media Composer, also offer various
tools and techniques to fix blown out footage. Though the specific methods may differ, the principles and
concepts behind the correction process are similar.